Wednesday, April 18, 2012
Customize Your Jewelry With Spray Paint
Monday, April 16, 2012
Upcycled Washi Tape Vase
When Kelly at Live.Laugh.Rowe mentioned that she was going to have a Washi tape Linky Party (or should I say, Par-tay!) I was so disappointed that I couldn’t participate because I was Washi-less. I could not find Washi tape in Canada. My only option was to order some online and it would have taken too long.
But then, Adrienne of Free Time Frolics shared on her blog that Michaels had started carrying “crafting tape” that was equivalent to Washi tape. Hallelujah! The next day, after supply teaching, I popped into Michaels and found exactly what I needed.
I do have to say that I am not overly impressed with the quality or the colour combinations available in each package.
It seems like there is one colour or pattern that is a “dud” in each pack of three.
For example, the green in the first package that I bought just looks like painter’s tape. In addition, the green has a sliver of tape that peels off the edge making it look a bit jagged. I’m actually tempted to bring it back.
Enough about that . . . just, buyer beware!
Using a $2 bottle of Lemon Italian Soda (yummy!) and two colours of tape, I created my first Washi project.
I alternated the green and polka dotted tape. Three strips of each.
Added water (that’s why my bottle is bubbly!)
Then, I cut a daffodil from my garden and gave it a pretty new home!
Before & After
This could not have been easier. I can’t wait to try out some other Washi projects!
Linking up to these great parties as well as those on my Link Parties page!
Thank you to all the hosts!
Sunday, April 15, 2012
Favourite Fonts Part 1
I love fonts.
I have almost 400 installed on my computer.
I think of fonts as accessories for my projects – the right font can completely transform a card, printable or sign.
Some of my favourite posts on the blogs that I follow are the ones where bloggers share great free font suggestions.
So, without dragging it out any longer, here are 10 of my current favourites!
These fonts are usually my go-to fonts when I cut any text or use my sketch pens with my Silhouette Cameo.
I recently discovered that Too Much Paper is a great font to weld together for text on cards.
You can download each of these fonts for free by clicking on the name.
1. Barrel 2. Champagne & Limousines 3. Desyrel 4. English Essay 5. Minya Nouvelle 6. Mossy 7. Ostrich Sans Rounded 8. Pea Hollee 9. Too Much Paper 10. Traveling_Typewriter
Here are some of my past blog projects that feature these fonts in action:
{More on this one next week}
Do you have any favourite fonts to recommend? I’m always looking for more!
Linking up to these Link Parties!
Thank you to all the amazing hosts!
Wednesday, April 11, 2012
Stencilled & Distressed Sign Tutorial
I’m back with the details on how I made my newest sign which is also the star of my revamped spring mantel.
After the daffodil incident, I decided that things needed to be shuffled around on the mantel. I wanted to add a sign or printable, but was coming up empty in the inspiration department.
Hours of Pinterest searching later, it suddenly dawned on me that I could have the best of both worlds – a sign that was both Spring-y and meaningful. Our street name is Glenrose and we moved here in 2008! FYI, I went with the ‘Glenrose Seed Company’ because it is too early for roses but not too early for planting seeds.
I designed the stencil for my sign in Silhouette Studio and cut it out using contact paper. After removing the unnecessary pieces, I applied a strip of clear contact paper on top of the stencil to transfer the placement of my letters and the rose.
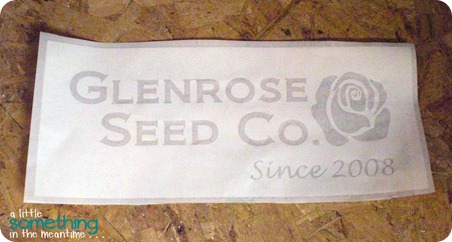
Then, I got hung up again on the technique to use for painting my sign. I consulted my D.I.Y. Wall Art board and found this great tutorial from Funky Junk Interiors. 26 000+ pins can’t be wrong!
Using acrylic paint (black, white, turquoise and green) and a Dollar Store paintbrush, this is what I did to make my “old” sign from a new piece of pine board.
{Disclaimer: I did this project in my basement so the progress photos are far from stellar}
After I weeded my stencil, I was left with this.
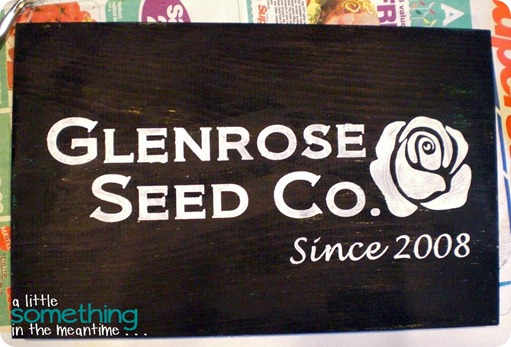
You could see that my white paint bled under the stencil in places. That, and it just looked too new.
No worries!
With a little TLC from my orbital sander and 220 grit sandpaper, my ‘new’ sign got a lot older.
After distressing, the turquoise and green that I used for my base coat peek through, imperfections from my stencilling are gone and the sign looks like it has been hanging outside for a few years.
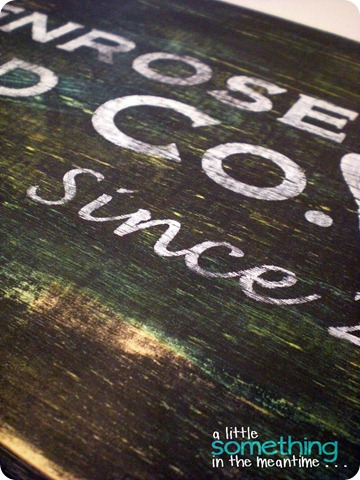
If you are going to make your own sign, my two tips would be:
- Use a bristled brush, not a foam brush. Brush marks and uneven coverage are good.
- Paint the letters of your sign the same way that you would print them so that the brush strokes change directions.
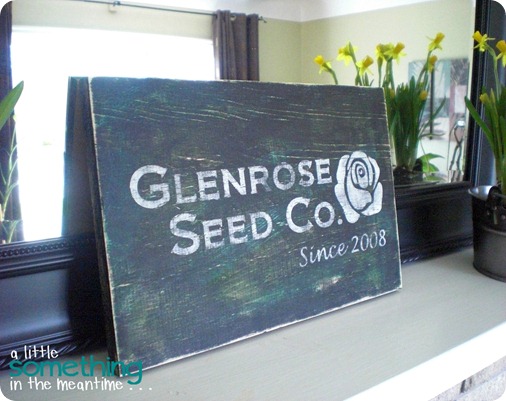
Next time, I would like to try this with black text and a white background!
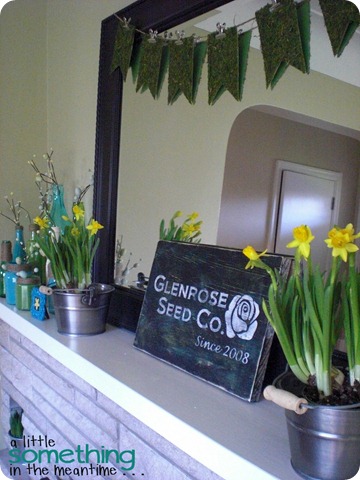
Do you have something that is meaningful to your family that you could incorporate into a sign?
Thanks for visiting!
P.S. Check out two other ways to make an ‘old’ sign here and here.
Linking up to these great parties as well as those on my Link Parties page!
Thank you to all the hosts!
Tuesday, April 10, 2012
Card Making with My Silhouette Cameo
I am still working on my sign tutorial (hooray for supply teaching every day this week!) but in the meantime, here’s a card that I made for my sister-in-law’s birthday celebration last weekend.
I have been making cards for my family and friends since I was little (and they are always signed “Claire Cards” on the back) so my Silhouette has been a wonderful tool for keeping up this tradition.
Here’s how easy it is to make a beautiful card with a die cut machine.
Ready? Blink and you’ll miss it!
1. Design your card (this is the part the takes the longest because there are SO many amazing choices in the Silhouette Store).
2. Cut your paper (double-sided paper is your friend).
3. Gather your materials for assembly.
4. Allow 5 to 10 minutes for assembly using your adhesives and brad.
5. Admire your newest card creation!
Done!
I can’t remember the last time that I had to buy a card for a special occasion.
Thanks, Silhouette . . . and Mr. Mechanic for having the brilliant idea to get me one for my birthday!
P.S. Check out the first card that I shared on my blog back in February – I already feel like that was AGES ago!
P.P.S. I always cut extras of everything when I make a card. See how I save the pieces here.