Showing posts with label Painted Signs. Show all posts

Tuesday, October 9, 2012

How to Make a New “Old” Sign

Tune Up Square WM

If you’ve been a reader for a while you know how much I enjoy making something new look old. 

My favourite victim? Painted signs.
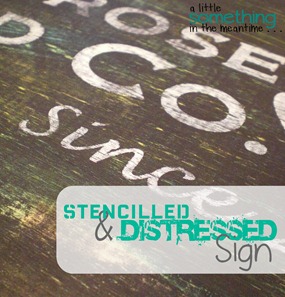
Stencilled and Distressed WM

Bloom Sign Before and After

Vintage Sign DIY

I have an entire Pinterest board of sign inspiration which includes this lovely pair from a site called 1stdibs:

Pinterest Tune Up Sign

Living with a mechanic, these would fit right in at our house.

Here’s my version of the second sign (which I promise I have no intention of selling since it is very, very similar).

Tune Up Sign WM

How to make a new “old” sign:

Paint board with blue acrylic paint.

Apply Contact paper stencil cut with Silhouette (Font = Bebas Neue) *everything blue was covered with Contact paper.

Paint over board and stencil with another coat of blue paint so that any colour that bleeds under the stencil is the base colour (totally worked!).

Spray paint top coat in Heirloom White. Heirloom White, you never fail me!

Peel off Contact paper stencil while still wet to reveal this:

Tune Up Sign No Distressing

Look at those crisp letters! This was my best stencilling job EVER!

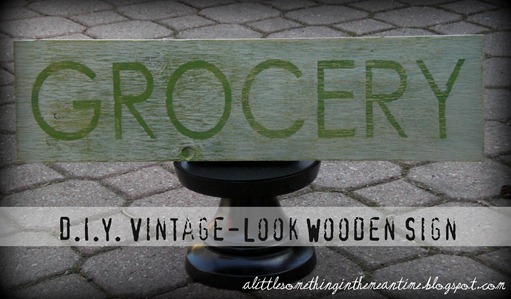
But, I wanted the sign to look old not new so I did the same thing as what I did with my vintage-inspired grocery sign – sand, sand and then sand some more!

To make it look a little dirtier I inked some spots with Tim Holtz’ distress ink and then smudged it in/wiped it off.

Tune Up Sign on Porch WM

Old-ish Canadian Tire tool box courtesy of Mr. Mechanic.

(I wanted to turn it into a fall planter filled with mums but that was vetoed)


Tune Up Sign Oil Can WM

Oil funnel courtesy of the shed at the cottage.

It belonged to Mr. Mechanic’s Grandpa.


Tune Up Sign 1 WM


Tune Up Sign in Toolbox WM

Before I made this I had already chosen the perfect spot to hang it: the wall across the bottom of the basement stairs. By hanging it low on the wall, you can see it through the window in the back door and while standing on the landing inside. 

The basement beyond the sign may be a work in progress, but the stairs have never looked better!

What do you think of my latest new “old” sign?

Pin It
 
P.S. Is anyone getting a higher than normal number of spam Blogger comments recently?  I don’t want to have to add Captcha to commenting but they’re driving me crazy!
 
P.P.S. Oh my goodness, 99 posts! Whew!

I link up at: Serenity Now, I {Heart} Naptime, Under The Table And Dreaming, Nifty Thrifty Things, Simply Klassic Home, Home Stories A to Z, Craftomaniac, Skip To My Lou, Not JUST A Housewife, A Bowl Full Of Lemons, Alderberry Hill, I Should Be Mopping The Floor, A Diamond In The Stuff, Creatively Living, The Winthrop Chronicles, Clean & Scentsible, Oopsey Daisy, Lil’ Luna, Someday Crafts, Live.Laugh.Rowe, The 36th Avenue, aka design, House of Hepworths, 52 Mantels, Thrifty Decorating, Crafty Scrappy Happy, How To Nest For Less, Tatertots & Jello, The Grant Life, It’s Overflowing, Lolly Jane, Too Much Time, Six Sisters’ Stuff, Positively Splendid, My {Re}purposed Life, Unrefined By Design, Just Us Four, Liz Marie Blog and The Crafted Sparrow

Tuesday, September 25, 2012

My Fall Mantel: Pumpkin Edition

Mr. Mechanic and I have a cat named Pumpkin so it’s safe to say that we enjoy all things fall. 

She’s gray not orange and her name was first a term of endearment when we decided to rename her after her adoption. She started out life as ‘Peppy’ but is definitely a Pumpkin.

I’m telling you this because Pumpkin was my inspiration for this year’s fall mantel.

I brought my tub of fall decorations upstairs, took out a frame wrapped in butcher paper and walked away for a minute. When I came back upstairs she was sitting right on top of it!

As I unpacked my decor, a pumpkin patch started to grow!

Pumpkin Patch WM

Since it’s Thanksgiving in two weeks, I decorate for fall first and then add touches of Halloween later.

I was already working on a fall sign, so I decided to run with the pumpkin theme this year.

Here it is!

Fall 2012 Mantel - 1


Fall 2012 Mantel - Full Length 1

From Left to Right:


Fall 2012 Mantel  - Vignette Vertical


Fall 2012 Mantel Vignette Chopped


Fall 2012 Mantel - Left Side Pumpkins 1


Fall 2012 Mantel - Pumpkin Sign 1


I used my Silhouette to create a stencil for my own sign after seeing this T.J. Maxx inspiration on the blog A Bowl Full of Lemons.


Fall 2012 Mantel - Pumpkin Sign 2


Fall 2012 Mantel - Right Side Pumpkins


Fall 2012 Mantel  - Burlap Banner


Fall 2012 Mantel - Floor Level


I even made a cameo appearance in my attempt to get a photo that was front and center. Peekaboo!


Fall Mantel Photo Bomb Arrow

This mantel is a great mix of old, new and a handful of D.I.Y. projects. Just the way I like it!

The two small bottles were cottage finds (the little one is actually an old Buckley’s bottle) and the tall bottle came from Goodwill last year. The braided jute ring is a 50 cent napkin ring from Michaels that I thought looked rustic.

My frame (which Pumpkin was sitting on) is a plastic Dollarama frame that I painted and glazed last fall to bring out the corner details. It is sitting on a book, also from Dollarama, which I wrapped with Kraft paper to cover the title. The edges of the pages have a fantastic texture to them!

The printable was created by Kristin at Simply Klassic Home. You can download your own copy of this beauty here.

The glass acorn was a clearance Michaels find last year in the Thanksgiving decor.  Are you noticing a pattern here?

All of the pumpkins and the sprig of bittersweet (thanks, Bronwyn!) are from Dollarama, Walmart or Michaels. I painted some of them and left others their original colour.  The little orange and yellow pumpkin on the right definitely needs to be a different colour. Any suggestions?

I made the burlap fall banner last year after seeing them everywhere. Super easy. Just burlap, acrylic paint, letter stencils (pre-Silhouette!) and twine.

My owls are from HomeSense (big: 2011, little: 2012) and the metal basket was my only splurge (HomeSense again) because I knew it would be a great way to display my birch logs. I scooped a big branch from my neighbours’ yard before the wood chipper got to it when the hydro company did their line maintenance last winter. Remember my poor tree?

The pumpkin on top is a faux pumpkin from Michaels that I spray painted Heirloom White.

Finally, the white lantern on the floor was a summer 2011 purchase from HomeSense. I filled the base with strips of burlap, pinecones and mini pumpkins to give it a less summery look.

(In case you’re wondering, that arrowhead plant in the pot lives on the mantel year-round because of how much it hangs so I just work around it. We re-potted it this summer and it loves its new digs!)

Fall 2012 Mantel - Full Length 1


Thank you so much for checking out my mantel!

Pin It
 
P.S. Want to know a ridiculously easy way to hang a banner? Check out my trick here!
 
P.P.S. Did you see my fall planter? The mums and asters are really starting to fill out now!

fall mantel party centsational girl


I link up at:
Serenity Now, I {Heart} Naptime, Under The Table And Dreaming, Nifty Thrifty Things, Simply Klassic Home, Home Stories A to Z, Craftomaniac, Skip To My Lou, Not JUST A Housewife, A Bowl Full Of Lemons, Alderberry Hill, I Should Be Mopping The Floor, A Diamond In The Stuff, Creatively Living, The Winthrop Chronicles, Clean & Scentsible, Oopsey Daisy, Lil’ Luna, Someday Crafts, Live.Laugh.Rowe, The 36th Avenue, aka design, House of Hepworths, 52 Mantels, Thrifty Decorating, Crafty Scrappy Happy, How To Nest For Less, Tatertots & Jello, The Grant Life, It’s Overflowing, Lolly Jane, Too Much Time, Six Sisters’ Stuff, Positively Splendid, My {Re}purposed Life, Unrefined By Design, Just Us Four, Liz Marie Blog and The Crafted Sparrow

Thursday, September 13, 2012

Golden Wedding Anniversary Sign

Last month my parents received an invitation for a 50th wedding anniversary celebration.

The invitation specified: no gifts, just well wishes. Being crafty, I suggested that I make a family name sign to commemorate the occasion knowing that the materials would cost about the same as a card.

Here is what I came up with:

Dixon Family Name Sign Zoom

The lettering is done in gold (my Mom’s great idea – apple doesn’t fall far from the tree) and provides the perfect contrast against the black paint.

Gold Stencil Zoom

I started with a pine board from Home Depot that I cut to size.

I painted the board (the second time . . . keep reading) with two layers of white (in case I decided to distress it later on) and then two layers of black Martha Stewart acrylic paint (my favourite brand for coverage and quality).

I designed the sign and then cut a contact paper stencil using my Silhouette.

I added a box around my text so that the cut stencil matched the dimensions of my pine board to make the spacing and alignment easier.

I used my new Scotch Blue Delicate Surfaces tape to transfer the stencil to my board. So easy and inexpensive compared to transfer tape!

Contact Paper Stencil

Using a Martha Stewart stencil brush I pounced on gold acrylic paint and learned that it is important to read the drying instructions when you are using metallic paint! It said to wait 1 hour between coats.

I first tried this with a different brand and stencilled too much too soon. It peeled off in pieces (like gold leaf, I assume) when I removed the contact paper. I had to start all over again.

Lesson learned!

I touched up the gold paint that bled under the stencil with a fine-tipped brush. I used the positive space of the stencil to cover the necessary letters and numbers and then painted around the edges.

After showing a photo of the painted and stencilled board to my parents via email, my Dad suggested that I add something to the corners. I searched the Silhouette store and couldn’t find anything I liked so I went with the next best thing, stripes!

I used this trick from KariAnne of Thistlewood Farm (see step #4) to create easy no-measure stripes using pin striping painter’s tape (since we already established that I don’t like to measure stripes here) and then stencilled them with one coat of gold paint.

I left the top and bottom edges of the board black but painted the sides with gold to make the gold of the stripes wrap around the board.

Dixon Sign Rocking Chair Vertical

Isn’t this a great personalized gift for a milestone anniversary?  Silver, gold, platinum . . .

Dixon Sign Mantel Orton WM


Pin It

P.S. You can see the rest of my front porch here.  I’m looking forward to switching it up for fall!


I link up at:
Serenity Now, I {Heart} Naptime, Under The Table And Dreaming, Nifty Thrifty Things, Simply Klassic Home, Home Stories A to Z, Craftomaniac, Skip To My Lou, Not JUST A Housewife, A Bowl Full Of Lemons, Alderberry Hill, I Should Be Mopping The Floor, A Diamond In The Stuff, Creatively Living, The Winthrop Chronicles, Clean & Scentsible, Oopsey Daisy, Lil’ Luna, Someday Crafts, Live.Laugh.Rowe, The 36th Avenue, aka design, House of Hepworths, 52 Mantels, Thrifty Decorating, Crafty Scrappy Happy, How To Nest For Less, Tatertots & Jello, The Grant Life, It’s Overflowing, Lolly Jane, Too Much Time, Six Sisters’ Stuff, Positively Splendid, My {Re}purposed Life, Unrefined By Design, Just Us Four, Liz Marie Blog,and The Crafted Sparrow
Related Posts Plugin for WordPress, Blogger...