Showing posts with label Tips and Tricks. Show all posts

Monday, July 23, 2012

Link Parties: A Blogging Tip

Link Parties Blogging Tip Banner

Do you link up your posts to link parties? When I’m feeling ambitious, I link up to several each day.

A while ago I figured out something that makes the process so much faster. I’m sure I’m not the first person to think of this, but I hope it will make someone’s life a little easier!

When you add your post to a link party you are prompted to select an image that will serve as the thumbnail for your submission.

Thumbnail images are square.

Photos are typically rectangular.

When you link up a rectangular photo you have to either crop your image or leave it up to the link party tool used by the party host.

As an example, here’s a photo of my spring porch planters.

Fun Garden Planters WM

If I don’t choose to crop my photo myself, my picture could potentially end up cropped like this:

Fun Garden Planters Crop Example

Where did the boots and bucket go?

Here’s how I want my thumbnail to look when I link up to a party.

Fun Garden Planters Square Crop Example

Or, I can take it a step further and include text to identify my project as well.

Fun Garden Planters WM Square

When faced with multiple thumbnail project images, which one would you be most inclined to click on?

Fun Garden Planters Crop ExampleFun Garden Planters Square Crop ExampleFun Garden Planters WM Square

Definitely not the first thumbnail!

So, what’s the trick?

When you’re editing your photos, take a photo that you want to use to showcase your project and crop it so that it works as a square image.

Remember to include a watermark that identifies your blog in this photo as well.

You can include it in your blog post or you can simply save it somewhere on your computer. I have a file folder that includes a square image for each project/post that I have done since I figured out this trick.

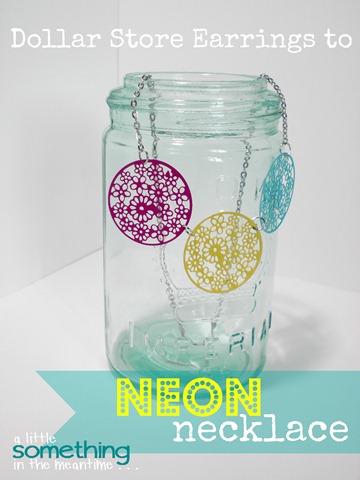
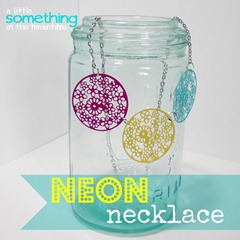
Here’s another example of some creative cropping – my Neon Dollar Store Necklace.

Neon Necklace Banner WM

Neon Necklace Banner Square WM

If you want to really take advantage of this trick, use the square image at the start of your blog post so that it is the first image that comes up when you add your post to a link party! As a bonus, this will also be one of the first images that comes up if someone wants to pin your project.

Now, when you link up one of your great ideas, you’ll have more control over what the thumbnail image looks like in a link party. As long as the dimensions of your image are square, you will lose very little of your image in the event that you do still need to crop it further.

Easy, right?

Happy linking!

Pin It

P.S. Want to know how to quickly watermark your photos? Check out another blogging tip here!


I link up at: Serenity Now, I {Heart} Naptime, Under The Table And Dreaming, Nifty Thrifty Things, Simply Klassic Home, Home Stories A to Z, Craftomaniac, Skip To My Lou, Not JUST A Housewife, A Bowl Full Of Lemons, Alderberry Hill, I Should Be Mopping The Floor, A Diamond In The Stuff, Creatively Living, The Winthrop Chronicles, Clean & Scentsible, Oopsey Daisy, Lil’ Luna, Someday Crafts, Live.Laugh.Rowe, The 36th Avenue, aka design, House of Hepworths, 52 Mantels, Thrifty Decorating, Crafty Scrappy Happy, How To Nest For Less, Tatertots & Jello, The Grant Life, It’s Overflowing, Lolly Jane, Too Much Time, Six Sisters’ Stuff, Positively Splendid, My {Re}purposed Life, Unrefined By Design, Dragonfly Designs, Just Us Four, Liz Marie Blog and The Crafted Sparrow

Thursday, June 28, 2012

My Window Boxes: I Must Be Doing Something Right!

2012 Window Boxes Square Banner

We will have lived in our house for four years this August. Coming from apartment dwelling, I didn’t know the first thing about maintaining a garden. Luckily I have two great resources – my Mom and my Mother-in-Law who are both avid gardeners. Much of our first summers here were spent asking “is this a weed?” because they are incredibly clever! If only the actual flowers were as genius as the weeds that mimic them.

Last summer, we started to take more risks with our gardens after completely digging two of them up to repair a parging problem that turned out to be much bigger than it looked.  After adding our own flower and shrub choices, it started to feel more like our garden instead of whatever the previous owners had thrown together.

In addition to multiple gardens, our house originally had 7 wrought iron window box frames mounted on the concrete sills. For the first two summers I filled them all up with an assortment of annuals that were on clearance, paying little attention to their sunlight and/or watering needs. It only took one year to learn that me and Lobelia do not get along!

Last year we took down the window boxes across the front of the house because they made it look too cluttered.  The two remaining window boxes sit underneath the garage and guest room windows. In June 2011 they looked like this:

2011 Window Box WM

(This would be the year that I discovered my go-to combination of chartreuse green sweet potato vine and purple heart)

I love the look of dark purple flowers against our red brick.

For my 2011 planters, I used store-bought liners from Canadian Tire. They weren’t a perfect fit, but they did the job. However, as the summer went on, squirrels started to dig in the soil and pull pieces of the coconut liner out at the ends. They looked really pathetic by the fall!
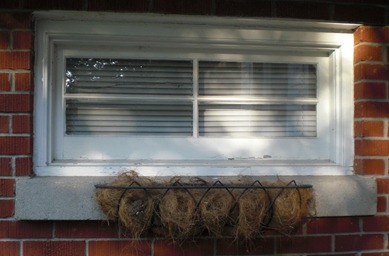
Window Box No Flowers

Guest Room No Flowers

I ran into a problem when I was getting ready to plant this year’s window boxes. I could not find any liners to fit a 30 inch window box. The 24 inch liners were too small (obviously) and the others I found were way too big.

What did I do?  I had to get creative!

I bought a 2 meter long piece of replacement coconut liner from Home Hardware that I cut in half to make the trough shape but then I had to find something to finish the ends. I had purchased one hanging wall planter from Dollarama to test whether it could be used to replace baskets on the other side of the garage. It came with a liner and looked like a much less glamorous version of this:Coconut Liner

It was too small to use for its original purpose, but that’s alright! Mr. Mechanic took one look at it and suggested that we cut the liner in half to create caps for the ends of each window box. He’s so smart!

After buying a second wall planter I was able to finally finish assembling the liners for my window boxes. I wrapped each half around the trough shaped piece to make a cap and then set the whole thing into the wrought iron holder.

Getting Creative

It ended up making the window box planter look much more finished than any of the replacement liners that I could have purchased.
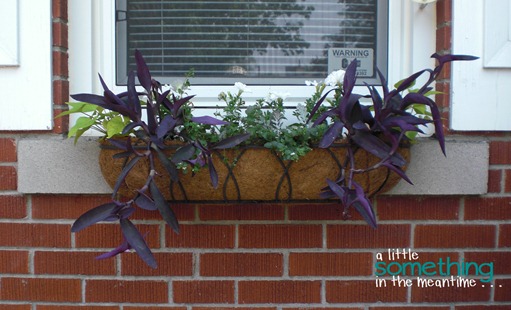
Guest Room May 28th WM

I had one more trick up my sleeve to improve upon last year’s planters.

I read on a few gardening sites that coconut liners make your planters dry up very quickly. Not only that, but when you water them, the soil drains out the bottom. To combat this, I cut the bottom off of two heavy duty garbage bags (love these for renovation garbage) and cut several holes in them for drainage. Once the planter was filled, I trimmed any excess that showed above the soil.

I planted these beauties on May 28th. Take a look at how much they have grown and filled out in just one month!

Here’s the window on the left (the garage) . . .
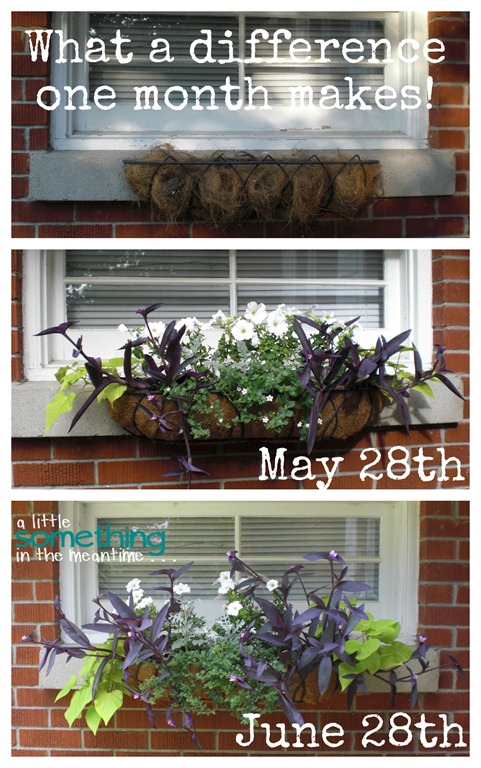
Garage Flowers One Month Wow

. . . and the window on the right (the guest room).

Guest Room Flowers Collage One Month WM

When we came home after our week up North we couldn’t believe how much they had grown!

I have not used any fertilizer on these planters, but I’m starting to think that the fancy potting soil I used this year was worth every penny. There is some sort of fertilizer additive in the soil that lasts 6 weeks. I am watering these about every 2 to 3 days and there is very little water that drains out (thanks to the garbage bag liner) yet they are not waterlogged, either. Last year I had to water daily!

So, what did I plant for 2012?

Being frugal, I searched around for the best deals but did end paying quite a bit for this year’s flowers (in comparison to my clearance window boxes of 2009 and 2010). They were far from inexpensive, but the curb appeal that they have added to the side of our house (which is what you see from the road – we’re on a corner lot) justified the price. That, and they make me so happy when I pull into the driveway!

Window Box Flower Labels

I originally bought purple petunias but at the last minute I decided that they would be competing with the planters we have on either side of the garage door as well as the purple heart. You can barely even see the petunias in last year’s window boxes.

The bacopa is meant to have little white flowers on it. So far, it is the only plant that has been a bit of a disappointment.

They were blooming in May . . .
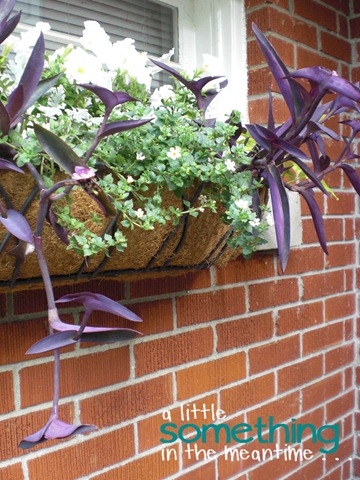
May 28th Trailing Plants

but disappeared in June!

June 28th Trailing Flowers

Here’s what both window boxes look like together:
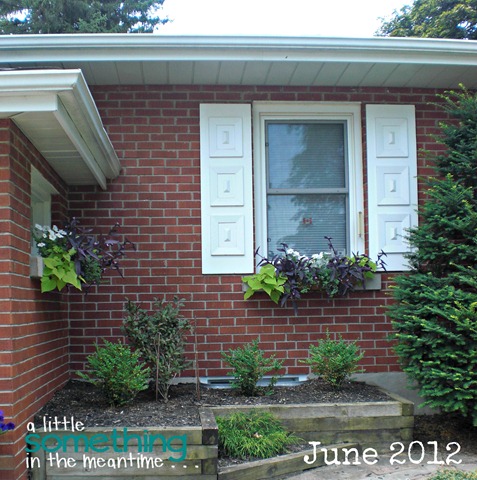
Both Window Boxes WM

(The rest of the garden is still a work in progress)

I still have a few more garden projects to share with you including a planter that I assembled using a great blog tip.

It is officially summer vacation for me now which means that I can blog whenever I want! I wouldn’t normally post twice in one day, but when I discovered that I planted my window boxes on May 28th, I just had to post about them today.

I hope your first week of summer has been wonderful!


Pin It

P.S. Check out my other great gardening success – rain boot planters! Soon I’ll have to pick a new flower for the summer.

P.P.S. Remember to enter my giveaway before July 5th!


I link up at: Serenity Now, I {Heart} Naptime, Under The Table And Dreaming, NiftyThrifty Things, Simply Klassic Home, Home Stories A to Z, Craftomaniac, Skip To My Lou, Not JUST A Housewife, A Bowl Full Of Lemons, Alderberry Hill, I Should Be Mopping The Floor, A Diamond In The Stuff, Creatively Living, The Winthrop Chronicles, Clean & Scentsible, Oopsey Daisy, Lil’ Luna, Live.Laugh.Rowe, The 36th Avenue, aka design, House of Hepworths, 52 Mantels, Thrifty Decorating, Crafty Scrappy Happy, How To Nest For Less, Tatertots & Jello, The Grant Life, It’s Overflowing, Lolly Jane, Too Much Time, Six Sisters’ Stuff, Positively Splendid, My {Re}purposed Life, Just Us Four and The Crafted Sparrow

Thank you to all the hosts!


Friday, June 1, 2012

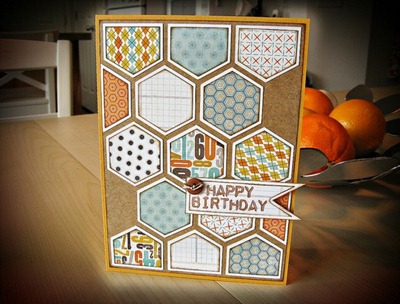
I Love Hexagons! {Masculine Birthday Card}

Masculine Birthday Card WM

After several days of creating my Dad’s birthday gift, I was finally able to deliver it to him yesterday. He thought that I had bought it!

Dad and Claire Birthday Edit

The sign has a back story and I want to make sure I get my facts straight so, I will share the details on how I made a piece of pine look like the side of a Harvard airplane after the weekend.

I always have fun making the card to accompany the gift but this year I had the extra pressure of knowing that this was my first post-Silhouette handmade birthday card for my Dad! I think he might still have last year’s card sitting on his bedside table.

Once I found my inspiration pinspiration, this card came together very quickly.

Flickr Image Hexagons

Source: jennecy via Claire on Pinterest

Not only did I love the hexagons, I already owned the paper pack that she used {My Mind’s Eye: Fine & Dandy}.

I have the 6 x 6 scrapbook pad and actually hesitated when it came to buying it last year at Winners. I put it back several times and finally bought it when I went back at a later date and found that it was still there. It was meant to be!

After cutting out the hexagons (reminder: double-side paper = more bang for your buck and easy colour coordinating) and the pennant with my Silhouette, I decided it was finally time to try out a new tool for inking the edges of each shape (I probably bought it 2 or 3 months ago).

Inkssentials Ink Blending Tool

To use it, I stamped my Tim Holtz Distress Ink in Vintage Photo onto a sheet of freezer paper and then transferred it to the edges of my shapes with the blending tool.

The blender creates a much softer inked effect in comparison to rubbing the edge of an ink pad directly onto your paper. It is so much quicker, too!

After arranging my hexagons and stamping my sentiment (total fluke that it stamped right on the line!), I attached all of the pieces with foam dots to add even more dimension.

I love the retro colour scheme and all of the fun patterns!

Dad Birthday Card 1 WM


Dad Birthday Card Tilted 2 WM


Dad Birthday Card Square WM


Dad Birthday Card BEV WM

Hmm . . . maybe that’s because it’s a lot like my blog’s colour scheme?

Dad’s birthday = crafting success!

Next up, Father’s Day!

Want some ideas? I have started a Father’s Day board on Pinterest to keep track of some of the great handmade ideas I come across.

I hope you have a great weekend!

Pin It

P.S. This paper also made an appearance in my Sister-in-Law’s adorable Nursery Artwork!


I link up at: Serenity Now, I {Heart} Naptime, Under The Table And Dreaming, Nifty Thrifty Things, Simply Klassic Home, Home Stories A to Z, Craftomaniac, Skip To My Lou, Not JUST A Housewife, A Bowl Full Of Lemons, Alderberry Hill, I Should Be Mopping The Floor, A Diamond In The Stuff, Creatively Living, The Winthrop Chronicles, Clean & Scentsible, Oopsey Daisy, Lil’ Luna, Live.Laugh.Rowe, The 36th Avenue, aka design, House of Hepworths, 52 Mantels, Thrifty Decorating, Crafty Scrappy Happy, How To Nest For Less, Tatertots & Jello, The Grant Life, It’s Overflowing, Lolly Jane, Too Much Time, Six Sisters’ Stuff, Positively Splendid and The Crafted Sparrow

Thank you to all the hosts!


Wednesday, May 30, 2012

Hanging A Banner: A Quick Tip

Remember my sheet moss banner?

Hanging Sheet Moss Banner

I still love it, but on more than one occasion I have walked into my Living Room to find that it has fallen down, leaving little pieces of sheet moss everywhere!

In the past, I would hang my banners using painter’s tape. However, something about my house (the humidity or direct sunlight, maybe?) makes it lose its stick.

Then, I had an epiphany!

Banner Hanging Tip Before


Banner Hanging Tip Take Two Hooks


Banner Hanging Tip Turn Upside Down

Stick the upside down Command hooks onto the surface where you will be attaching your banner. {Obviously you would choose more discreet hooks if they were going to be visible!} I tried styling my mantel without the mirror and it looked naked. So, the hooks are adhered to the back of my giant mirror.

Now, I can tie an adjustable loop at each end of my banner and hook it around the Command hook for hanging.

Banner Hanging Tip Adjustable Knot

Super easy and . . .

Banner Hanging Tip After

It’s my Dad’s birthday today (Happy Birthday, Dad!) and I am so excited about the gift that I made for him! Once he has seen it, I can share it with you!

In the meantime, do you have any why-didn’t-I-think-of-that tips or tricks to share?

Pin It
 
P.S.  Check out another banner idea, here (it’s not just for St. Patrick’s Day!)
 

I link up at: Serenity Now, I {Heart} Naptime, Under The Table And Dreaming, Nifty Thrifty Things, Simply Klassic Home, Home Stories A to Z, Craftomaniac, Skip To My Lou, Not JUST A Housewife, A Bowl Full Of Lemons, Alderberry Hill, I Should Be Mopping The Floor, A Diamond In The Stuff, Creatively Living, The Winthrop Chronicles, Clean & Scentsible, Oopsey Daisy, Lil’ Luna, Live.Laugh.Rowe, The 36th Avenue, aka design, House of Hepworths, 52 Mantels, Thrifty Decorating, Crafty Scrappy Happy, How To Nest For Less, Tatertots & Jello, The Grant Life, It’s Overflowing, Lolly Jane, Too Much Time, Six Sisters’ Stuff, Positively Splendid and The Crafted Sparrow

Thank you to all the hosts!


Related Posts Plugin for WordPress, Blogger...